The idea of Mushroom farming came to India a few years back. The knowledge about the health benefits of mushrooms popularised the notion of including mushrooms in our diet. Since then, mushroom farming has become very popular among farmers, homemakers, NGOs, SHGs, and many others. Now mushroom farming is in vogue and success stories of mushroom farmers pop up every day on the internet.
Mushroom farming is one of the most profitable farming business ideas that you can venture into. Currently, the Netherlands, the U.S., China, and Italy are the top producers of mushrooms. Significant production happens in India where Uttar Pradesh is the top mushroom-producing state followed by Tripura and Kerala.
In this age, in which mushroom farming is growing at an exponential rate, it is important to understand deeply about mushroom farming and venture into it as soon as possible. For this, we have created the best mushroom farming guide where you will get detailed information about various types of mushrooms grown in India and step-by-step instructions on how to grow each type of mushroom.
Types of Mushrooms Grown in India
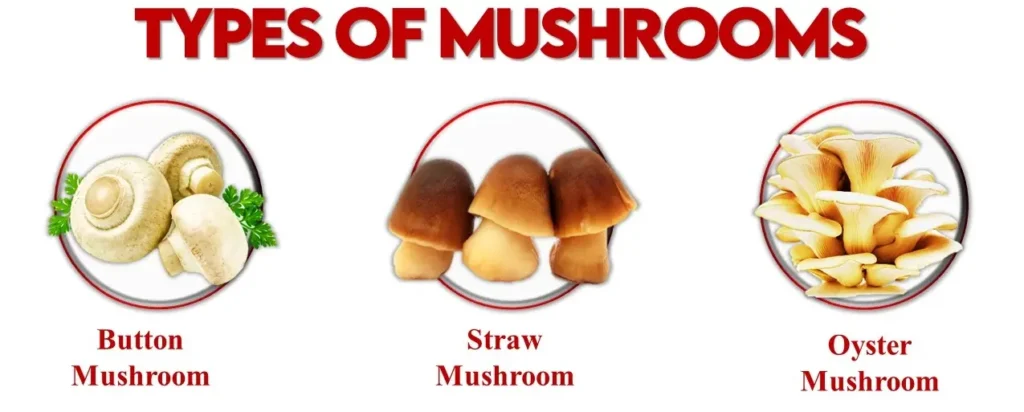
India is considered a heaven for mushrooms because of the humid and moist tropical conditions that prevail in the country. However there 3 major mushroom varieties that are extensively cultivated in India. They are
Button Mushroom (Agaricus bisporus)
Button mushrooms are the immature form of the edible fungus Agaricus bisporus, which also includes cremini mushrooms and portobello mushrooms. They have a pale white color and measure 1 to 3 inches across.
Straw Mushroom (Volvariella volvacea)
Straw mushrooms, also known as paddy straw mushrooms, are edible mushrooms cultivated throughout East and Southeast Asia and used extensively in Asian cuisine. They are often available fresh in regions where they are cultivated, but elsewhere are more frequently found canned or dried.
Oyster Mushroom (Pleurotus ostreatus)
Oyster mushrooms are one of the most common types of cultivated mushrooms in the world. They have broad, thin, oyster- or fan-shaped caps and are white, gray, or tan, with gills lining the underside.
| Sl. No | Mushroom Type | Optimum Growth Conditions |
| 1 | Button Mushroom | Temperature: 13-21℃Humidity: 90-100%Good ventilation required |
| 2 | Straw Mushroom | Temperature: 35-40℃Humidity: 85-95%Well ventilated rooms |
| 3 | Oyster Mushroom | Temperature: 13-18℃Humidity: 70-90%Good air circulation |
Also Read
Cultivation of Different Types of Mushrooms in India
We have looked at the types of mushrooms grown in India. Now it is time to understand how each of these mushrooms can be cultivated for gaining maximum profits.
How to Cultivate Button Mushrooms in India?
Here is a detailed step-by-step guide on how to grow button mushrooms in India:
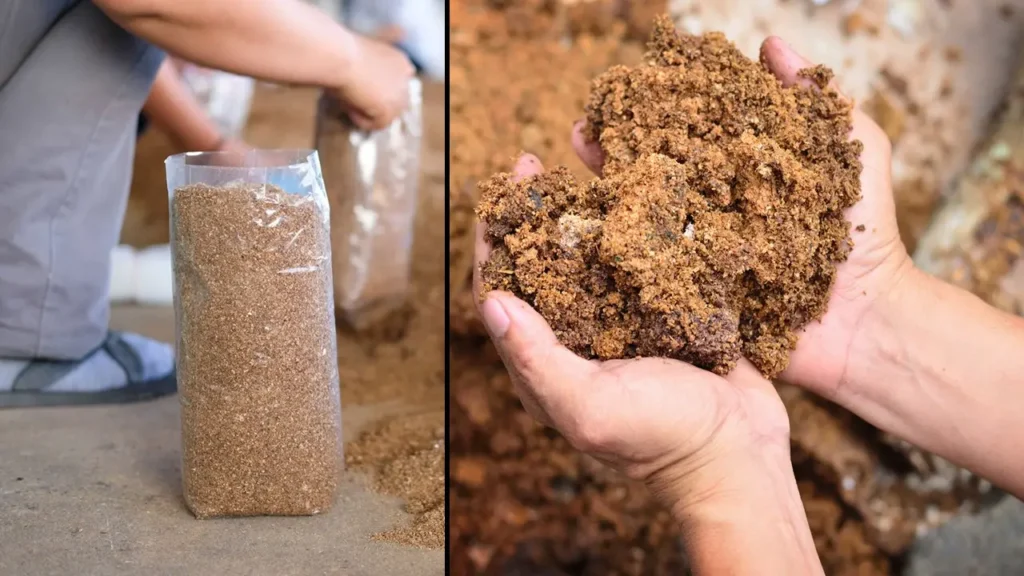
Mushroom Spawn Production
In spawn production, mycelium from the mushroom breed is placed onto steam-sterilized grain, and in time, mycelium completely grows through the grain. This mixture (grain-mycelium) is called spawn and this spawn is then sent for further process of composting. Spawn can be produced in the labs or can be purchased from other sources.
Preparation of Compost
Compost is an artificially prepared means for the growth of spawn. It is the mixture made by adding plant wastes, salts, other supplements, and water. Compost prepared by the short method is convenient for high-yielding mushroom production and requires more resources and capital.
Here are the detailed steps for preparing different types of compost suitable for cultivating button mushrooms:
- Long Method of Composting:
- The compost is made on a clean cement floor or in an open field.
- Spread straw on the floor and sprinkle water on it to make it wet.
- This process can be done irrespective of the season.
- The temperature for the vegetative growth ranges between 20 to 25°C.
- The carbon dioxide levels should not exceed 0.10 %.
- The rooms should have good ventilation.
- Short Method of Composting:
- This method is convenient for high-yielding mushroom production.
- It requires more resources and capital.
- It gives high-quality mushrooms with less chance of infection.
- Compost Using Horse Manure and Barn Waste:
- This compost is traditionally prepared by using horse manure and barn waste consisting of straw bedding of wheat or barley.
- These are taken in the proportion of 4:3.
- To this mixture, generally, 100 kg of chicken manure and 5 kg of urea are added per tonne of substrate.
- Compost Using Equal Parts Compost and Manure:
- Button mushrooms require a growing environment that contains a lot of nitrogen.
- Make a mixture of equal parts compost and manure.
- You can use your own compost and purchase manure, like horse or cow manure.
Now you would have understood in detail about composting in mushroom farming. So we can move on to the next step.
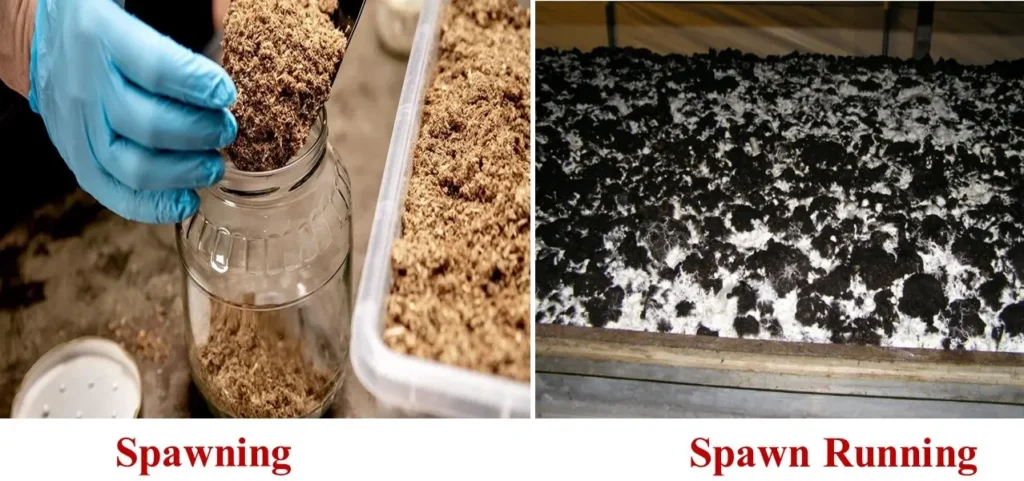
Spawning
The spawning process in mushroom cultivation is a crucial step that involves the introduction of mushroom mycelium, known as spawn, into a prepared substrate. Here’s a detailed explanation:
The spawn is a mixture of mycelium and a substrate, such as grain. The mycelium, which is the vegetative part of the fungus, is grown on the substrate in a laboratory setting. This spawn is then used to “seed” the mushroom compost.
The process of mixing spawn with compost is called spawning. In surface spawning, grain spawn is scattered all over the surface of the compost in trays or racks, which are then covered with a thin layer of compost. Double-layer spawning is usually done under unfavorable environmental conditions at low temperatures. Spawning involves thoroughly mixing the desired quantity of spawn in the required quantity of compost, which is then filled in racks, trays, or bags.
Spawn Running
Spawn running refers to the period during which the mycelium from the inoculated spawn starts to colonize the new substrate. Here’s a short note on it:
After the substrate is prepared and inoculated with mushroom spawn, the spawn run phase begins. During this phase, the mycelium grows and colonizes the substrate. This is a crucial step as the mycelium acts as a primary source of nutrients for the growing mushrooms.
The spawn run phase requires a controlled environment to ensure the mycelium’s healthy growth. The temperature for the vegetative growth ranges between 20 to 25°C. The carbon dioxide levels should not exceed 0.10 %. The rooms should have good ventilation.
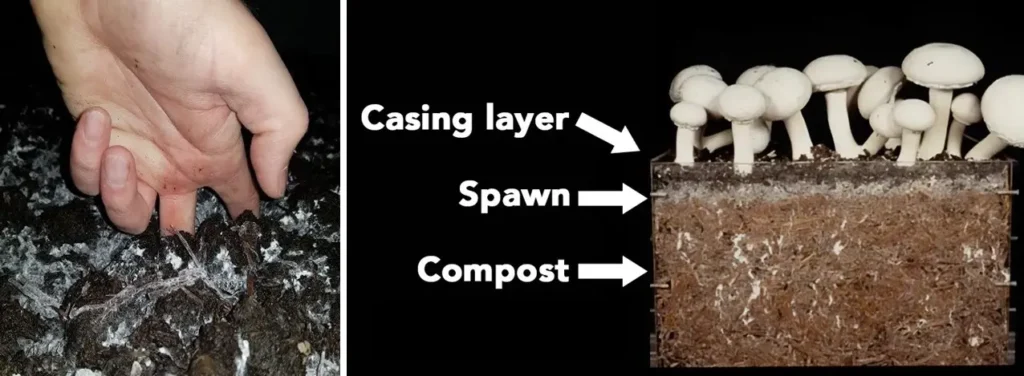
Casing
Casing is the process of applying a layer of soil, known as casing soil, to the colonized compost. This casing layer acts as a water reservoir and is where the mushroom fruits will form.
The casing soil is usually a mixture of peat moss and ground limestone. It can also be a combination of garden loam soil to sand (4:1) or decomposed cow dung to loam soil (1:1). Before use, the casing should be steam sterilized, formaldehyde (2%) and Bavistin (75 ppm) treated.
The casing process begins by unfolding the fully spawned run bag and making the top surface even by gently pressing with hands. A light spray of water is applied to the spawn run compost. Then, a 4-5 cm thick layer of casing is applied uniformly using iron rings of 4 cm height or wooden blocks. Water is sprayed in installments immediately after the casing application.
After casing, the temperature and humidity are carefully controlled to encourage the growth of mushrooms. The temperature should be maintained at 23–28°C and a relative humidity of 85–90% for 8–10 days after casing. Fruiting is favored by low CO2 levels.
Fruiting
The fruiting process, also known as pinning, begins once the mycelium has fully colonized the substrate and the casing layer. Under favorable environmental conditions, the fruit body initials, which appear in the form of pinheads, start growing and gradually develop into the button stage. These conditions include a temperature initially around 23 ± 2°C for about a week and then 16 ± 2°C, moisture (2-3 light sprays per day for moistening the casing layer), humidity above 85%, proper ventilation, and CO2 concentration between 0.08-0.15%.
Cropping and Harvesting:
The cropping and harvesting process begins about three weeks after casing. The mushrooms are ready to be harvested when the crowns are 2.5–4 cm long. Harvesting involves gently twisting the mushrooms without disrupting the casing soil. Once the harvesting is complete, the gaps in the beds should be filled with fresh sterilized casing material and then watered.
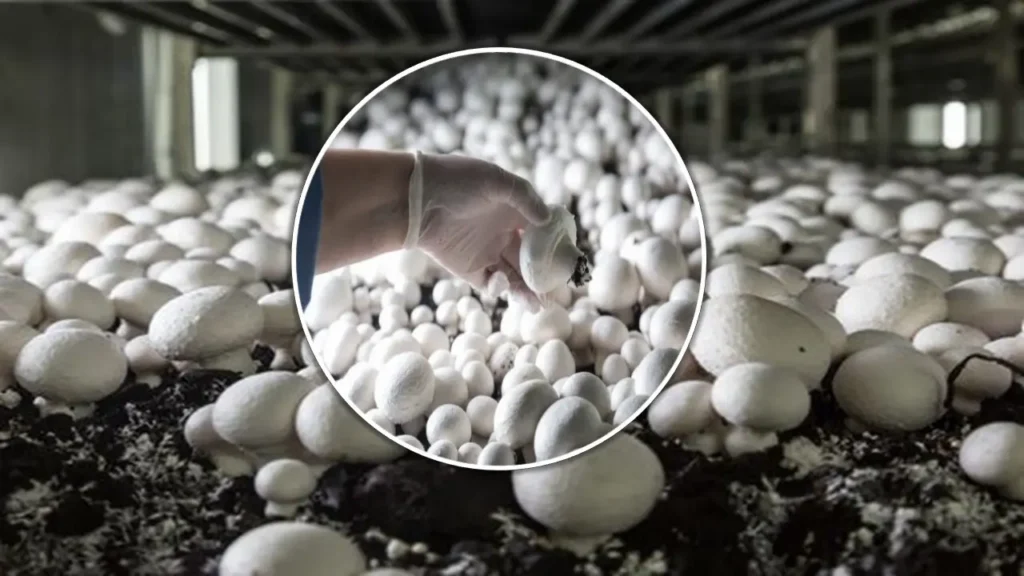
Mushrooms need to be harvested by light twisting without disturbing the casing soil. About 10-14 kg of fresh mushrooms per 100 kg of fresh compost can be obtained in two months. The growers can take on average 3-4 crops of white button mushrooms in a year depending upon the type and varieties cultivated.
Remember, it’s very important for a mushroom grower to undergo a practically oriented training programme. Also, the Indian government is promoting mushroom cultivation and they give subsidies under different schemes like the National Horticulture Board, Ministry of Food Processing, and APEDA.
That wraps up the detailed step-by-step guide on button mushroom farming in India. Let us now move on to the next topic. Cultivation of paddy straw mushrooms.
Paddy Straw Mushroom Farming in India
Paddy straw mushrooms, also known as Volvariella volvacea, are a popular variety of edible mushrooms in India. Here are the steps involved in the preparation of paddy straw mushrooms in India.
Spawning
The spawn preparation for paddy straw mushrooms involves obtaining a starting culture from an authorized agency or raising it by tissue culture method, single spore culture technique, or multispore culture technique. The culture of paddy straw mushrooms cannot be kept at low temperatures, hence, cultures are normally kept at 17-20°C or above.
The spawn of this mushroom can be prepared on several substrates like grains, straw, etc. Many prefer to use paddy grains or even paddy straw for spawn. In the case of paddy straw mushrooms, after inoculation, the bags are incubated at temperatures of 30-35°C. It takes only 5-7 days for complete colonization of the substrate and the spawn becomes ready for use within a week. Spawn cannot be stored and may be used within 10-15 days.
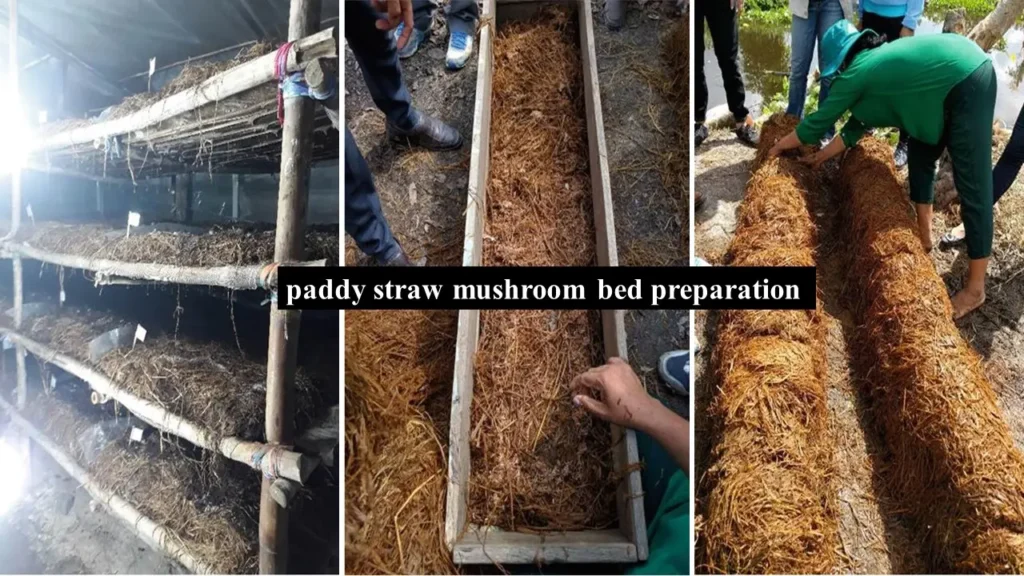
Bed Preparation
Sure, here’s a detailed description of the bed preparation process for paddy straw mushroom cultivation:
Step 1: The first step in the cultivation of paddy straw mushrooms is the selection of straw. Paddy straw is the most commonly used substrate, but wheat and barley straws can also be used. The straw should be dry, clean, and free from mold and other contaminants.
Step 2: The selected straw is then cut into small pieces, usually about 3-5 cm in length. This can be done manually with a sickle or mechanically with a chaff cutter. Cutting the straw increases the surface area for the mushroom mycelium to colonize.
Step 3: The cut straw is soaked in water for 12-16 hours. This is done to increase the moisture content of the straw, which is necessary for the growth of the mushroom mycelium. The water used for soaking should be clean and free from contaminants.
Step 4: After soaking, the straw is boiled for 1-2 hours to kill any existing microorganisms.
Step 5: The boiled straw is then spread out to cool and drain. It should be cooled to room temperature before being used for bed preparation. Excess water should be drained off to prevent waterlogging, which can inhibit the growth of the mushroom mycelium.
Step 6: The cooled and drained straw is mixed with mushroom spawn (the mycelium of the mushroom grown on a suitable medium such as grains or sawdust). The spawn is mixed thoroughly with the straw to ensure even colonization.
Step 7: The spawned straw is packed into beds or bags to form the mushroom beds. The beds should be compact but not too tight, as this can restrict the growth of the mushroom mycelium. The beds are then covered with a layer of newspaper or plastic to maintain humidity and temperature.
Step 8: The prepared beds are kept in a dark and humid place for the mushroom mycelium to colonize the straw. This process, known as incubation, usually takes about 1-2 weeks.
Step 9: Once the mushroom mycelium fully colonizes the straw, it is exposed to light and fresh air to induce fruiting. The mushrooms usually start to appear within a few days.
Harvesting
Harvesting of paddy straw mushrooms occurs when they are young, typically within 2-3 days of the first appearance of the pinheads. The entire mushroom, including the base, is carefully plucked without disturbing the mycelium in the straw. Harvesting is done early in the morning or late in the evening to prevent wilting. The harvested mushrooms are then cleaned and used fresh or preserved for later use.
Oyster Mushroom Farming in India
Sure, here’s a detailed step-by-step guide on Oyster mushroom farming in India:
Spawn Production
The first step is to produce the spawn. This involves sterilizing a mixture of wheat or sorghum grains and then inoculating them with mushroom mycelium. The inoculated grains are incubated at 25°C for 15-20 days until the mycelium fully colonizes them.
Substrate Preparation
Oyster mushrooms can be grown on a variety of substrates. Commonly used substrates include straw, sawdust, and agricultural waste. The substrate is cut into small pieces, soaked in water for 12-24 hours, and then sterilized by boiling at 100°C for 1-2 hours.
Inoculation
The sterilized substrate is cooled to room temperature and then inoculated with the spawn. The spawn is mixed thoroughly with the substrate to ensure even colonization. This is usually done in polythene bags or bottles which are then sealed to prevent contamination.
Incubation
The inoculated bags or bottles are kept in a dark and humid place for the mushroom mycelium to colonize the substrate. This process, known as incubation, usually takes about 15-20 days at a temperature of 25-30°C.
Fruiting
Once the substrate is fully colonized, it is exposed to light and fresh air to induce fruiting. The temperature is lowered to 15-20°C and the humidity is maintained at 85-90%. The mushrooms start to appear within 5-7 days.
Harvesting
Oyster mushrooms are harvested when the edges of the caps begin to turn upwards. This is usually 5-7 days after the mushrooms first appear. The entire mushroom is plucked from the substrate and the base is trimmed off.
Post-Harvest Handling
The harvested mushrooms are cleaned and sorted based on their size and quality. Drying is done at 50-60°C until the moisture content is reduced to 10-15%.
This process can yield up to 20-25 kg of fresh mushrooms per 100 kg of dry substrate. However, the yield can vary depending on the strain of the mushroom, the quality of the substrate, and the environmental conditions. Always remember to maintain cleanliness and avoid contamination during the entire process to ensure a successful harvest.
Also Read
Conclusion
Mushroom farming is one of the most profitable farming businesses in India. The low initial investment and low ongoing expenses guarantee the profitability of mushroom farming. In India, 3 types of mushrooms are grown extensively. Button mushrooms, Paddy straw mushrooms, and Oyster mushrooms and we have looked at a detailed guide on the cultivation of each mushroom. The various processes involved are spawn production, composting, bed preparation, spawning, fruiting, and harvesting. Each of these processes has to be done with utmost care along with the regulation of temperature, humidity, and ventilation. Then only you can achieve maximum production and churn out maximum profits.
Latest Post
- March 2026 – Times of Agriculture Magazine

- Design Perfect Sales Posters with AI Background Generator Assistance

- February 2026 – Times of Agriculture Magazine
- January Issue 2026- Times of Agriculture Magazine
- Top 10 Agricultural Drone Companies in India
- December Issue 2025- Times of Agriculture Magazine
- November Issue 2025- Times of Agriculture Magazine
- Punjab & Sind Bank Introduces Special Program to Support Food and Agro-Processing Sector
- Beyond Classrooms and Gardens: How a Professor Turned His Passion into Purpose